Cleanup broken package

I tried to downgrade the flashplugin to the previous 9 release, but all .deb installer packages I found on the web fail, cause they try to download a non-existing file from Macromedia website.

The problem I run into was that my Ubuntu system thought that the flashplugin-nonfree package was installed on the system, but I always failed to remove it with aptitude, apt-get or synaptic, leaving the package marked as broken.

Couldn't reinstall, nor purge, nor install any other package, because my system always claimed about the flashplugin-nonfree package.

Errors like these appeared:
 Package is in a very bad inconsistent state - you should
 reinstall it before attempting a removal.
Finally, I found some instructions which are able to remove the package information completely from the system, leaving apt in a state, where the package isn't marked as installed nor broken.

Install instructions

sudo rm -rf /var/lib/dpkg/info/flashplugin-nonfree.*
sudo dpkg --remove --force-depends --force-remove-reinstreq flashplugin-nonfree

Just replace flashplugin-nonfree with any package name that gives you trouble.

Global problems with the package repository

Sometimes you might not be able to install any package and you receive strange errors, like this:
Could not initialize the package information
A unresolvable problem occurred while initializing the package information.
Please report this bug against the 'update-manager' package and include the following error message:
'E:Encountered a section with no Package: header, E:Problem
 with MergeList 
/var/lib/apt/lists/archive.ubuntu.com_ubuntu_dists_hardy-updates_multiverse_binary-i386_Packages,
 E:The package lists or status file could not be parsed or opened.'
Somehow, apt's internal package repository cache got corrupted, so with the following commands you can recreate it from scratch.
sudo rm /var/lib/apt/lists/* -vf
sudo apt-get update
Now, you should be able to install packages as usual.

Trying to install from an outdated repository

It might be even worse, your Ubuntu version is an old release and is not supported any longer.
In that case, it's repositories are moved to an archive server.
You get errors like:
Reading package lists... Done               
Building dependency tree       
Reading state information... Done    
E: Couldn't find package xyz

But your package is probably available at http://old-releases.ubuntu.com
 The reason for this is that it is now out of support and no longer receiving updates and security patches.
If you don't want to upgrade to a newer distribution but want to continue using your outdated release then edit /etc/apt/sources.list and change archive.ubuntu.com to old-releases.ubuntu.com
sudo sed -i -e 's/archive.ubuntu.com\|security.ubuntu.com/old-releases.ubuntu.com/g' /etc/apt/sources.list
sudo apt-get update

Pin down the oficial Firefox version in Ubuntu

Today, I'll write an article about a more complicated administration tool: APTs pinning.

What is pinning?


Pinning is used to prevent your Ubuntu system to upgrade a package to a higher version through its automatic update system.

Why do you want to prevent an update?


Well, maybe the newer version of an application isn't working the way you want to or is buggy and you prefer to use the older version.

In my example, this happened to me with Firefox. The version 3.5 that ships with the official Ubuntu repositories works perfect.
But as I enabled the Mozilla-Daily repository from Launchpad to install the better Thunderbird 3.0 (see my article about installing it), that same repository also holds a newer version from Firefox. So my system all the time tries to upgrade to the version from Launchpad, which works worse for me.

How could I prevent upgrading Firefox from that repository, but still be able to use and update my Thunderbird 3.0 package from that one?

Obtain list of priorities


After searching through several articles and forum post, finally I found the tool I needed to setup the pinning.
apt-cache policy
apt-cache policy firefox-3.5

Whereas the first command shows a list of all your enabled repositories and their priorities, the second one gives you information about a concrete package.

In my case it shows:
firefox-3.5:
Installed: 3.5.4+nobinonly-0ubuntu0.9.10.1
Candidate: 3.5.5+nobinonly-0ubuntu0.9.10.1
Version table:
3.5.6~hg20091129r26611+nobinonly-0ubuntu1~umd1~karmic 0
50 http://ppa.launchpad.net karmic/main Packages
3.5.5+nobinonly-0ubuntu0.9.10.1 0
500 http://archive.ubuntu.com karmic-updates/main Packages
500 http://archive.ubuntu.com karmic-security/main Packages
*** 3.5.4+nobinonly-0ubuntu0.9.10.1 0
100 /var/lib/dpkg/status
3.5.3+build1+nobinonly-0ubuntu6 0
500 http://archive.ubuntu.com karmic/main Packages

You can see the installed version is 3.5.4, there is a newer version 3.5.5 from the official Ubuntu repositories, and a newer version 3.5.6 from the Luanchpad repository.
Interesting to look at is the Candidate: line, which shows the version that will be installed next by the update mechanism. Normally, this would be 3.5.6, but in my case, I lowered the priority of the Launchpad repository to 50, which is lower than the default, so it is not selected any more.

You want to know how this is possible? Read on.

Use pinning to lower upgrade priorities


The trick lays inside the /etc/apt/preferences, use man apt_preferences to read more about it.
Just execute the following instruction:

sudo echo "Package: *
Pin: release o=LP-PPA-ubuntu-mozilla-daily
Pin-Priority: 50" > /etc/apt/preferences.d/Mozilla-Daily

## or if that doesn't work for you (tried it only on Karmic):
sudo echo "Package: *
Pin: release o=LP-PPA-ubuntu-mozilla-daily
Pin-Priority: 50" > /etc/apt/preferences

sudo apt-get update


How to obtain the correct values


Remember the apt-cache policy command? Searching its output, you find the information:
 500 http://ppa.launchpad.net karmic/main Packages
release v=9.10,o=LP-PPA-ubuntu-mozilla-daily,a=karmic,n=karmic,l=Ubuntu,c=main
origin ppa.launchpad.net

From the release line I just selected the o=LP-PPA-ubuntu-mozilla-daily, enough to clearly select which packages will be pinned.

After the apt-get update, you will not be troubled any longer by the firefox updates from that repository, but the thunderbird-3.0 updates will still show up, because it doesn't exist in the official repositories.

Troubleshooting


I run into some trouble and will share the solutions here as well.

Can't find the o=LP-PPA-ubuntu-mozilla-daily entry


This happened in one of my machines, so at the end I had to pin down the whole Launchpad repositories, not only the Mozilla-Daily one.
sudo echo "Package: *
Pin: origin ppa.launchpad.net
Pin-Priority: 50" > /etc/apt/preferences.d/Mozilla-Daily
sudo apt-get update


Firefox and/or xulrunner still update from Mozilla-Daily


That happens when some packages have been updated from the Mozilla-Daily repository before. You'll need to downgrade them to a version from the official repositories.
Here an example (find the correct version with the apt-cache policy command):
sudo aptitude install firefox-gnome-support=3.5.5+nobinonly-0ubuntu0.9.10.1

Speed-up Ubuntu Boot-up time

I found these really interesting instructions which can speed up Ubuntu's startup.

The updates include a new kernel and replaces sreadahead with superfast ureadahead. To install these updates, follow these simple steps:

Install instructions

  1. Open the "Software Sources" under System->Administration.
  2. Select the “Other Software” tab.
  3. Click the “Add…” button in the lower left-hand
  4. Type “ppa:ubuntu-boot” and hit the “Add Source”
  5. Allow the system to refresh the sources
  6. Run “Update Manager” under System->Administration
That’s it! It will install the new kernel and replace sreadahead with ureadahead. You’ll need to reboot twice to see the benefits. The first reboot allows ureadahead to profile your boot so it can do its magic.

See also corresponding project on Launchpad.

Screensaver for Ubuntu Karmic


Ubuntu Karmic by default has very few screensaver modules enabled.
If you're a fan of screensaver, then I recommend you the following extra packages with install you more the 300 new modules.

Install instructions


sudo aptitude -y install xscreensaver-data-extra xscreensaver-gl-extra rss-glx


By the way, the rss-glx package gives you the beautiful skyrocket screen saver.

Instrumentation tools for Ubuntu

If you are a developer, administrator or you just want to track down some malfunction of your system, then some of these tools can be very handy.

sysdig

sysdig is a open source, system-level exploration: capture system state and activity from a running Linux instance, then save, filter and analyze.
Think of it as strace + tcpdump + lsof + awesome sauce.

systemtap


SystemTap provides infrastructure to simplify the gathering of information about the running Linux system. This assists diagnosis of a performance or functional problem. SystemTap provides a simple command line interface and scripting language for writing instrumentation for a live running system.

htop


Htop is an ncursed-based process viewer similar to top, but it allows to scroll the list vertically and horizontally to see all processes and their full command lines.

ethtool


ethtool can be used to query and change settings such as speed, auto- negotiation and checksum offload on many network devices, especially Ethernet devices.

EtherApe


EtherApe displays network activity graphically. Active hosts are shown as circles of varying size, and traffic among them is shown as lines of varying width.

Bandwidth Monitor NG


Bandwidth Monitor NG is a small and simple console-based live bandwidth monitor.

dstat


Dstat allows you to view all of your network resources instantly, you can for example, compare disk usage in combination with interrupts from your IDE controller, or compare the network bandwidth numbers directly with the disk throughput.

hping


hping3 is a network tool able to send custom ICMP/UDP/TCP packets and to display target replies like ping does with ICMP replies.

nast


nast is a packet sniffer and lan analyzer and can sniff in normal mode or in promiscuous mode the packets on a network interface and log it. Filters can be applied and the sniffed data can be saved in a separated file.

Install instructions


sudo aptitude install systemtap htop ethtool etherape bwm-ng hping3 nast
curl -s https://s3.amazonaws.com/download.draios.com/stable/install-sysdig | sudo bash

Ubuntu Karmic 9.10

This weekend I reinstalled one of my laptops with the latest Ubuntu release.
I didn't upgrade, because this installation was still young, without lots of personal tweaks and I read somewhere that if you upgrade from 9.04 you will miss some things that aren't upgraded by default like
  • partition with ext4 filesystem
  • encription of your home directory
In this post I'll put my impressions.
  • Design: I like the new darker brown theme and the startup screen is so beautiful. Icons are much better designed as well.
  • Firefox is 3.5 now, and is really fast at startup. Faster than the 3.5pre I used for the last weeks.
  • Thunderbird 3.0 isn't included, only 2.x can be installed. That sucks!
  • Wine: You should install the beta release, programs run so much faster, especially the GUI painting speeds up.
  • A new harddisk tool is included, which gives easy access to Smart information (healthy state about your disk).
    But the partition editor isn't included by default, you'll have to install it by hand.
  • The new Ubuntu Software Center isn't that useful as I thought. Okay, it's better than the old Application Installer, but most of the software I still have to install from Synaptic as it can't be found in the other one.
  • The Ext4 file-system seems to be really fast, find and locate finish in a few seconds.

Profile Switcher Extension for Firefox

The ProfileSwitcher extension enables you to use several profiles in Firefox and Thunderbird.
So you could create a developer profile and install all programmer extensions (like Firebug, Web Developer toolbar, etc.).
But if you just want to navigate, you don't need them and loading all of them just slows down the startup time of Firefox. Just use another profile without them, with a different set of extensions.

From the extension's preferences, you can choose what to do when you launch another profile (close the one in use, don't close it, ask every time).

Install instructions


Unfortunately, this extension can't be found on Mozilla yet, so just download it from the home-page or use this link to download the recent one when this post was written.

Creating large Documents using OpenOffice.org Writer

One of OpenOffice.org's strengths is its ability to handle large word processing documents. In this recently released guide of 48 pages, you'll learn how to create and manage large documents.

Topics include:

  • Developing table of contents, indexes, appendices
  • Working with templates, cross-references
  • Handling graphics, tables, charts
  • Using OOo powerful style guides to manage page styles, paragraph styles, and character styles
  • And a lot more helpful tips and tricks

Download this guide now (without passing through the registration form).

Duplicate file cleanup

CloneSpy (Windows)


CloneSpy can help you free up hard drive space by detecting and removing duplicate files. Duplicate files have exactly the same contents regardless of their name, date, time and location. Also, CloneSpy is able to find files that are not exactly identical, but have the same file name, or the file size differs only a bit.

FSlint (Linux)


FSlint is an utility to fix problems with filesystems' data, like duplicate files
is a toolkit to clean filesystem

fdupes (Linux)

FDupes uses md5sums and then a byte by byte comparison to find duplicate files within a set of directories. It has several useful options including recursion. This is the fastest one.
sudo aptitude install fdupes

You can instruct fdupes to delete duplicate files automatically, but you can't be sure it will delete always from the system folder.
Therefore, you could execute the following command:
fdupes -r a/ b/ | grep -o "^b/.*" | xargs -d '\n' rm ; find b/ -empty -delete

Linux shell commands

In an Ubuntu forum, they worked out a pipe of shell commands, to generate the same output as fdupes. So you don't have to install any software, but it's also much more slower (see benchmarks below).
find . ! -empty -type f -printf "%s " -exec ls -dQ {} \; | sort -n | uniq -D -w 1 | \
cut -d" " -f2- | \
xargs md5sum | sort | \
uniq -w32 -d --all-repeated=separate | \
cut -c35-


Benchmarks

722 groups
994 duplicate files
6205 files

FSlint 10 minutes
fdupes 5,5 minutes
Piped commands 13 minutes

Hard links


If you don't want to remove duplicates, but save memory you can use hardlink (or fdupes) on Linux which detects multiple copies of the same file and replaces them with hardlinks.
For example in my case:
Files:    5935
Linked:   991 files
Compared: 4022 files
Saved:    4.87 GiB
Duration: 12.6 minutes

Extension collections for Firefox and Thunderbird


On Mozilla they started a new kind of extension sharing, so called Collections.
You can create your own set of useful extensions and share them with the whole world.

So here I'll share two collections with you, one for Firefox, the other for Thunderbird.
These collections are the extensions that I've installed and use on a daily basis.

Video Edition for Linux

You have some nice vacation video in your Camcorder and want to edit it on your Linux system.
It seems, that Windows user are more luckily, lots of video edition software exists (for example ULead), but Linux users also can edit their videos with free software.

In this post, I'll comment about three applications, which are powerful and easy to use.

Kino


Kino
Kino is a non-linear digital video editor which supports many basic video editing and assembling tasks.
But its main feature is the import from raw AVI and DV files, as well as capture footage from digital camcorders using the raw1394 and dv1394 libraries, and export to camcorders using the ieee1394 or video1394 libraries.
During import, it detects scene changes (when you stopped grabbing) and can split the scenes into separate files.


For me, its the application which works best when passing my videos from the digital camera onto the hard drive, without frame dropping.

Install instructions


sudo aptitude install kino

or click here to install it from the browser.

Troubleshooting


A normal user doesn't have privileges to the RAW 1394 device, which is used to transfer data from the camcorder to the computer. You would have to launch Kino as superuser or execute the following commands:
sudo modprobe raw1394
sudo chmod a+rw /dev/raw1394


To make these changes permanent:
sudo echo "install raw1394 /sbin/modprobe --ignore-install raw1394 $CMDLINE_OPTS ; \
sleep 0.5 ; \
/bin/chmod a+rw /dev/raw1394" > /etc/modprobe.d/raw1394.modprobe


OpenShot


OpenShot is a video editor for GNU/Linux, being simple but yet powerful. It has all functionality one would need for day-to-day video cutting and assemblage.

Its interface supports themes, is very eye-candy and integrates well with Gnome.
You can see a list of features on its website.

Install instructions


sudo add-apt-repository ppa:jonoomph/openshot-edge
sudo apt-get update
sudo apt-get install openshot openshot-docs

or see instructions here if you don't use Ubuntu Karmic.

Kdenlive


Kdenlive
Kdenlive is an intuitive and powerful multi-track video editor, including most recent video technologies.
It has tons of video and audio effects and video snippets can be arranged visually on the several tracks.
The resulting video can also be exported to DV devices, or written to a DVD with chapters and a simple menu.

Where Kino's importing feature is more powerful, Kdenlive is so much better when editing and creating the "final cut".

Install instructions


sudo aptitude -y install kdenlive

or click here to install it from the browser.

DVD Authoring


You should install the following additional programs, so you can export the video from Kdenlive to a DVD folder which can be burned to DVD directly.
sudo aptitude install ffmpeg lame mjpegtools dvdauthor

Thunderbird 3.0 and Lightning


Similar to my previous post about Firefox 3.5, you can also go and use Thunderbird 3.0 already.

Even if its codename is Shredder and some of your extensions will stop working, I highly recommend this beta version,
  • especially if you access IMAP mail accounts, because the access is so much faster now.
  • the automated account creator which guesses the servers ports and settings is also a great invention I haven't seen in any mail client so far.
But not everything is gold, as mentioned before, most of your extensions will not work yet (see below how to get Lightning work, the most important one). I also don't like so much the cosmetic change in the layout which puts information like tags, and command buttons above the message content. This eats up to much space, especially for small screens like laptops.

Install instructions


sudo -v

echo "deb http://ppa.launchpad.net/ubuntu-mozilla-daily/ppa/ubuntu jaunty main" > /tmp/MozillaDaily.list
sudo mv /tmp/MozillaDaily.list /etc/apt/sources.list.d
sudo apt-key adv --keyserver keyserver.ubuntu.com --recv-keys 247510BE
sudo apt-get update
sudo aptitude install thunderbird-3.0 thunderbird-3.0-gnome-support

# Create a new entry in gnomes alternatives system and set Thunderbird 3.0 to be the preferred choice.
sudo update-alternatives --verbose --install /usr/bin/thunderbird thunderbird /usr/bin/$(readlink /usr/bin/thunderbird) 60
sudo update-alternatives --verbose --install /usr/bin//usr/bin/thunderbird thunderbird /usr/bin/thunderbird-3.0 70
sudo update-alternatives --verbose --auto thunderbird
# See current configuration, should result in:
## thunderbird - status is auto.
## link currently points to /usr/bin/thunderbird-3.0
## /usr/bin/../lib/thunderbird/thunderbird - priority 60
## /usr/bin/thunderbird-3.0 - priority 70
## Current `best' version is /usr/bin/thunderbird-3.0.
sudo update-alternatives --verbose --display thunderbird
# If you get into any trouble and want to use your previous Thunderbird again, just change the selection with
## sudo update-alternatives --config thunderbird


Get Lightning working again


The latest oficial release of Lightning will not work with the Thunderbird 3.0 pre release, so you'll have to install the latest nightly build.
wget http://ftp.mozilla.org/pub/mozilla.org/calendar/lightning/nightly/latest-comm-1.9.1/linux-xpi/lightning.xpi
# If you want to connect to Google Calendar:
wget http://ftp.mozilla.org/pub/mozilla.org/calendar/lightning/nightly/latest-comm-1.9.1/linux-xpi/gdata-provider.xpi

As Thunderbird 3.0 pre gets updated, from time to time, Lightning could stop working again.
Just download again the latest nightly build and install it again.
To make things easier, someone created an extensions for updating to nightly builds.

Firefox 3.5 is out

They released the latest version of this magnificent web browser.


Go here to see real-time download statistics and a world map where Firefox 3.5 is downloaded.


Install instructions


sudo -v

echo "deb http://ppa.launchpad.net/ubuntu-mozilla-daily/ppa/ubuntu jaunty main" > /tmp/MozillaDaily.list
sudo mv /tmp/MozillaDaily.list /etc/apt/sources.list.d
sudo apt-key adv --keyserver keyserver.ubuntu.com --recv-keys 247510BE
sudo apt-get update
sudo aptitude install firefox-3.5 firefox-3.5-gnome-support latex-xft-fonts

# Create a new entry in gnomes alternatives system and set Firefox 3.5 to be the preferred choice.
sudo update-alternatives --verbose --install /usr/bin/firefox firefox /usr/bin/$(readlink /usr/bin/firefox) 60
sudo update-alternatives --verbose --install /usr/bin/firefox firefox /usr/bin/firefox-3.5 70
sudo update-alternatives --verbose --auto firefox
# If you get into any trouble and want to use your previous Firefox again, just change the selection with
# sudo update-alternatives --config firefox


Note


Some instructions come from this post.

Ubuntu 9.04 Jaunty - Disable Update Notifier


Previous versions of Ubuntu notified with a simple panel icon about new available updates.
With Ubuntu Jaunty this behaviour changed, and the update manager window is opened automatically.
In my opinion, this is very annoying, I prefer the panel icon advisor where I can launch the update manager whenever I want.

So I searched and found the corresponding setting in the systems Configuration Editor.

From the GUI


Open Gnome's Configuration Editor from Applications-->System Tools (maybe you'll have to install it first).
Enter the key /apps/update-notifier and uncheck the auto-launch flag as shown in the screenshot.

From a terminal


gconftool -s --type bool /apps/update-notifier/auto_launch false


Post note: After writing this post I found a thread from the Ubuntu forum discussing this problem.

Windows Vista

Finally, I had the opportunity to play around with Windows Vista Home Edition, which doesn't seem to have to much exit. And after struggling around, with an original (a friend convinced me to repair his broken PC), these are my conclusions:
  1. To start, let me explain what happened: A Worm entered his system and damaged something in the part of the system which handles the user accounts. It was impossible to enter the system, because when entering the session screen, it already shut down.
    So much about all these protection mechanism they included into Vista: A simple Worm can damage your system badly.
  2. The repair option, well, it wasn't an option, because it didn't work. It wasn't able to restore any of the three restore points it had created.
    Therefore, I had to do a fresh install.
  3. After having reinstalled Vista from scratch, well, at least a good surprise is the fact that you don't have to assist during the whole installation process. Previous versions asks you all the time about details, in Vista they ask you all near to the end.
    Well, I still prefer the Ubuntu way, ask everything you need at the beginning, then let the installation go on and when you come back, you already have an operative system in your PC.
  4. Okay graphics are nice, but no fancy 3D effects like with Compiz.
  5. Advise about 75 updates, ... it took more than 3 hours to download and install all of them, with several reboots.
    Come on, with Ubuntu it takes not even 2 hours to download and install more than 1000 updates when updating from Intrepid to Jaunty, with one reboot.
  6. Vista also fries your hard-disk, nothing changed from previous versions, your hard-disk is clicking a lot and operating all the time.
  7. IE rebooted the whole system when trying to download software from Softonic.
    That IE crashes, okay, but why do you reset the whole system?????
  8. I was not able to delete the previous Vista system, backed up in Windows.old folder. I had to start the PC with Ubuntu's LiveCD to be able to delete the whole folder.
After installing the necessary drivers and the Avast AntiVirus, I quickly shut off Windows Vista, packaged my friends PC and I'll never again use that operating system.
No software is perfect, but one you pay for, sorry Microsoft, I expect much more.

I'll stick to XP if I need to, and use Ubuntu for most of my tasks.

Tweak your Ubuntu startup - the graphical way


There exists two handy GUI applications that you can install from the applications menu:
Search for StartUp-Manager and BootUp-Manager and install the one which is interesting for you.

StartUp Manager

configures some settings for grub and splash screens (colors of grub screen, if messages will be shown during booting, ...).

BootUp Manager

is a graphical tool to allow easy configuration of init services in user and system runlevels, as far as changing Start/Stop services priority.
See also this post about this tool.

Install instructions from shell


sudo aptitude install startupmanager bum
or click these links: Install Startup Manager, install BootUp Manager.

File-Roller: Support of non-default archive types

File-roller is a graphical archive manager and ships with the default Ubuntu installation.

File-roller doesn't perform archive operations by itself, but relies on standard tools for this.
Unfortunately, by default it supports only a few formats, like .tar, gzip, bzip2 etc. Other less common formats you can find on the web, like 7z, ace, lzh, just to mention some, aren't supported by your default Ubuntu installation.

You could wait, each time you find an unsupported format, to search and find the corresponding package you need and install it, or ...

From Synaptic


Open the synaptic package manager, search for file-roller, right click the package, Mark Suggested for Installation, and select the ones you need (or want).

Install instructions from terminal


sudo aptitude install arj binutils cpio lha lzop ncompress p7zip-full rpm rzip sharutils unace unalz unrar zoo

Problems with Lightning on Ubuntu Jaunty


After putting on my fresh Ubuntu Jaunty installation, my favourite Email client Thunderbird, the Lightning extension (version 0.9), didn't worked at all.
I tried everything, reinstalling Thunderbird several times, disabling all other extensions, nothing.
Lightning painted some icons, but that was everything.
Some incompatibility. I installed SunBird 0.9, and it works fine. Earlier Lightning versions seemed to work also, so what is the matter?

Solution


Finally, I found the solution in some forum, you need to have libstdc++ version 5 on your system (Jaunty comes with version 6 by default). And it has to be there, when Lightning extension 0.9 is installed, so if you already have it in your Thunderbird setup, uninstall it first, then put libstc++5 on your system, and reinstall the Lightning extension.
sudo aptitude install libstdc++5
# or if you don't want to install more stuff:
ln -s /usr/lib/libstdc++.so.6 /usr/lib/libstdc++.so.5

Install new fonts in your system

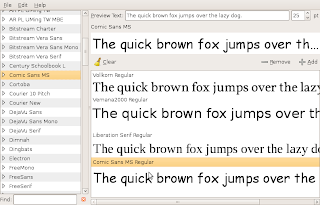
Specimen Font Previewer
In a previous post, we learned how to convert Open Type fonts into True Type ones.
Now we'll learn how to store them in your system, so all text and graphics applications will find and use them.
Normally, you'll not un-/install fonts continuously on your system, so you would prefer (like me) a simple way, without the need to install additional software (like kfontview on KUbuntu, or the ones you can find for Windows).

On Ubuntu


All fonts can be stored in two locations:
  1. In ~/.fonts
    Only you will see fonts copied here. You can copy fonts here with nautilus or from the shell:
    mkdir -p ~/.fonts         # make sure folder exists
    cp *.tff ~/.fonts # or whatever's the name of the fonts you want to copy
    fc-cache -f -v ~/.fonts # reload the font cache to make new fonts visible

  2. In /usr/share/fonts/truetype
    All users will see fonts copied here. You can copy fonts here with nautilus or from the shell:
    mkdir -p /usr/share/fonts/truetype/myfonts    # create a sub-folder to be organized
    cp *.tff /usr/share/fonts/truetype/myfonts # or whatever's the name of the fonts you want to copy
    fc-cache -f -v # reload the global font cache to make new fonts visible


No extra software is needed. But even so, we'll mention a useful tool that doesn't come in your default Ubuntu installation: Specimen Font Previewer, a simple tool to view and compare fonts installed on your system.
You can install it from the Applications menu or from the shell:
sudo aptitude install gnome-specimen


Note: In a previous post, I explained how to install certain Microsoft fonts on your Ubuntu system.

On Windows


Fonts are installed in only one location: %WINDIR%\Fonts
Just open this location with the explorer and copy any font files here. They'll be immediately available for all users.

Convert Open Type fonts to True Type


FontForge, a multi-platform font editor, allows you to create and modify postscript, truetype and opentype fonts. You can save fonts in many different outline formats, and generate bitmaps.
We'll use it here to convert one format to another.

Convert Open Type to True Type with FontForge


On Ubuntu systems, we can create a conversion script, that does the conversion automatically. Paste the following in your favourite shell
sudo -v
# Make sure with have fontforge installed on our system
sudo aptitude install fontforge
echo '#!/usr/bin/fontforge
# Quick and dirty hack: converts a font to truetype (.ttf)
Print("Opening "+$1);
Open($1);
Print("Saving "+$1:r+".ttf");
Generate($1:r+".ttf");
Quit(0);' > otf2ttf.sh
chmod a+x otf2ttf.sh

## The following lines are examples of the usage:
#
# Convert MyFont from Open Type to True Type in the same location:
# ./otf2ttf.sh MyFont.otf
#
# Convert all Open Type fonts of the current folder:
# for font in $(ls *.otf); do ./otf2ttf.sh $font; done
#
# Convert all Open Type fonts even in subfolders:
# find . -name *.otf -exec ./otf2ttf.sh {} \;
Note: I found the original script in this blog, but mine has slightly changes to be called directly.

FontForge can also be used on Windows systems, but I have no instructions for doing the conversion automatically, so you'll have to load the font and then store it again in the TrueType format.

In the next post we'll see how to install True Type fonts in our Ubuntu system.

Ubuntu 9.04 Jaunty - Feedback

As always, when you upgrade your system to the latest version, some things work better, others worse.
Here's a list of things that I found (in general, I recommend installing Jaunty):
  • wallpaper-tray disappeared
    Hm, well, not exactly, it just changed to be an integrated panel applet, so just add it with Add to panel... on your top-panel.
  • OpenOffice 3.x is so much faster now!
    But, all my installed extensions disappeared and I have to reinstall all of them.
    Moreover I got the error "Could not create Java implementation loader" when installing some extensions. To solve this problem just install the "openoffice.org-java-common" package.
  • At the moment there are no hardware drivers for your video card, so 3D animations will likely not work at the beginning.
    Update on 12/5/2009: compiz still is unstable, on two of my laptops, moreover, I can't create a dual-monitor setup with more than 2048x2048 like before.
  • mail-notification suddenly opens sticky message boxes for each e-mail arrived. It doesn't use Ubuntu's new notification mechanism.
    You can enable avant-window-managers notification area, so that problem is gone, but also the mentioned notification mechanism which is more beautiful.
  • Synaptic now offers to show you a screenshot of an application before you install it, but there aren't so much available yet.
  • Video playback of totem got a big boost! Now I can play HDTV movies on my laptop which wasn't possible before without stuttering.

Automatic paging on Firefox

AutoPager Homepage
Once upon a time, there existed a great extension for Firefox called repagination.
It gave you the possibility to right click on the Next link of a forum and load the next linked pages at the end of the current page. This was so useful, because you could read almost all post. Or load a bunch of Google results right into the current page. Cute.
But when Firefox upgraded to version 2.1+ this extension stopped working.
Since then, I had it always installed waiting that some day it got updated for the latest Firefox.

Since yesterday.

Finally, I found a decent replacement, eh, what I'm saying, ..., a so much better replacement: AutoPager.
And this extension really rocks!
It automatically loads the next page of a site inline when you reach the end of the current page for infinite scrolling of content. You don't even have to click anywhere. AutoPager works with a ton of sites, including Lifehacker, of course, Google .......
Just try it on this blog, endless scrolling through all my posts automatically.
And it offers a Wizard for creating next-link detections for new sites.

Example for EurobillTracker Rankings:

URL Pattern: http://en.eurobilltracker.com/rankings/*
Link XPath: //a[contains(text(),'Next >>')]
Content XPath: //body/table/tbody/tr/td/table/tbody/tr/td/table[1]

Install Ubuntu from Alternate CD

Ubuntu Home
Just figured out a quicker way to update our Ubuntu sytem, instead of using the automatic update system (which can take hours to download almost a Giga of packets, caused by saturation of update servers, especially the first days after a new Ubuntu version has been launched).

It is also very interesting when you have to update several systems, in my case three.
You don't have to burn any CD!

Install instructions


  1. Download the alternate CD ISO image (assume you store it in your home directory).
    You could use the Torrent, which downloads so much quicker.
  2. Next we'll mount that ISO image, and launch the upgrade process so that it uses almost all packages from the CD.
sudo -s
mount -o loop -t iso9660 ~/ubuntu-9.04-alternate-i386.iso /media/cdrom0
sh /cdrom/cdromupgrade

Maybe, you'll still have to download some packages, depending on how much additional software you installed on your system, but at least the most of them you just downloaded with more speed (a big file, instead of hundreds of small packages).

Ubuntu 9.04 (Jaunty Jackalope)

The latest version of this magnificent operating system just arrived today.

You can download CD images from their Ubuntu Releases site.

Upgrading through the integrated updater, will come soon.

Subversion 1.6 Quick Reference Card


  • You want to know subversions new features?
  • You like quick reference cards like the ones that come with emacs and gdb?

Get the Subversion Quick Reference card for Subversion 1.6. This two-page PDF document summarizes common Subversion command line commands, subcommands and switches.

Found on CollabNet.

Mind mapping - Freemind


FreeMind is a premier free mind-mapping software written in Java and therefore a multi-platform high productivity tool.
It claims that its operation and navigation is faster than that of MindManager (a commercial software only for Windows).

A mind map is a diagram used to represent words, ideas, tasks, or other items linked to and arranged around a central key word or idea. Mind maps are used to generate, visualize, structure, and classify ideas, and as an aid in study, organization, problem solving, decision making, and writing.

Install instructions


I highly recommend to install the latest release candidate 0.9.0rc3. Just unpack the archive somewhere and launch freemind with one of the startup scripts for your platform (and of course, make sure you have Java installed).

Automatic updates


If you want to get automatic updates, use Ubuntu's package management.
sudo -s
echo "deb http://eric.lavar.de/comp/linux/debian/ unstable/deb-src http://eric.lavar.de/comp/linux/debian/ unstable/
deb http://eric.lavar.de/comp/linux/debian/ experimental/
deb-src http://eric.lavar.de/comp/linux/debian/ experimental/" > /tmp/freemind.list
mv /tmp/freemind.list /etc/apt/sources.list.d
aptitude update
aptitude install freemind
exit

At the moment, this will install Release Candidate 1-2, not the latest one.

Picasa Photo Organizer


Picasa is a very powerful image manager.
It's main features are:
Organize

Organize
Manage your photos in one place, and find photos you forgot you had

edit

Edit
Eliminate scratches & blemishes, fix red-eye, crop and more

create

Create
Turn photos into collages, slideshows and more

share

Share
Upload seamlessly to Picasa Web Albums to share with friends, family & the world


Install instructions for Linux


Just copy and paste the following instructions into a Terminal (you'll have to do it twice, as the first sudo -v stops the rest of instructions):
sudo -v
# Add Google's public package signing key on your system to prevent warnings or errors
wget -q https://dl-ssl.google.com/linux/linux_signing_key.pub -O- | sudo apt-key add -
echo "deb http://dl.google.com/linux/deb/ stable non-free #Google repository" > /tmp/GooglePicasa.list
# If you don't want to install the beta testing version, don't paste the following line:
echo "deb http://dl.google.com/linux/deb/ testing non-free #Google testing repository" >> /tmp/GooglePicasa.list
sudo mv /tmp/GooglePicasa.list /etc/apt/sources.list.d/
sudo aptitude update
sudo aptitude install picasa

Firefox Window Border Fix

Today I had the same strange window border error as I had once with Thunderbird:

Suddenly, it started to miss its borders of the main window, being maximized always and didn't react on any changes like shrink, move, resize, maximize.
It covers the toolbar completely and when you open for example its addons window it doesn't show up, because it is hidden beneath the main window.

The fix is very similar:

  • Close Firefox

  • Edit by hand the file ~/.mozilla/firefox/xyz1234.default/localstore.rdf in your default profile directory.

  • Search the entry

    <RDF:Description RDF:about="chrome://browser/content/browser.xul#main-window"
    width="800"
    height="600"
    sizemode="normal"
    screenX="5"
    screenY="5" />

  • Change the width, height and screenXY entries to the ones you see here

  • Restart Firefox and it should have its borders again.

Access Subversion from Emacs


Emacs is a feature-rich text editor, with perhaps, more editing commands than any other editor or word processor


There exists lots of documentation in Internet about this great editor, for example the following links are very useful:


Integration with Subversion


There exist several plugins for the integration of Emacs with Subversion
, but the best one is Svn Status Mode. It's work is based on previous plugins, like vc-svn and dsvn.


Installation


You can get the very latest version with any of the following commands:


  1. sudo svn export http://svn.collab.net/repos/svn/trunk/contrib/client-side/emacs/psvn.el /usr/share/emacs/site-lisp/psvn.el

  2. sudo wget -O /usr/share/emacs/site-lisp/psvn.el http://www.xsteve.at/prg/emacs/psvn.el

  3. sudo wget -O /usr/share/emacs/site-lisp/psvn.el http://svn.collab.net/repos/svn/trunk/contrib/client-side/emacs/psvn.el


Add the following line to your ~/.emacs


(require 'psvn)


How to use


From now on, you find a new menu entry Tools-->SVN Status in the XEmacs.


  • You can also launch the command Alt-x svn-status directory .

  • It opens a new buffer *svn-status* where you can see all files controlled by Subversion, with flags that indicate there state.

  • Inside the XEmacs you have a menu which gives you access to all kind of commands for commiting and more, if not, just have a look at the mentioned Wiki or issue the command Ctrl-h m.

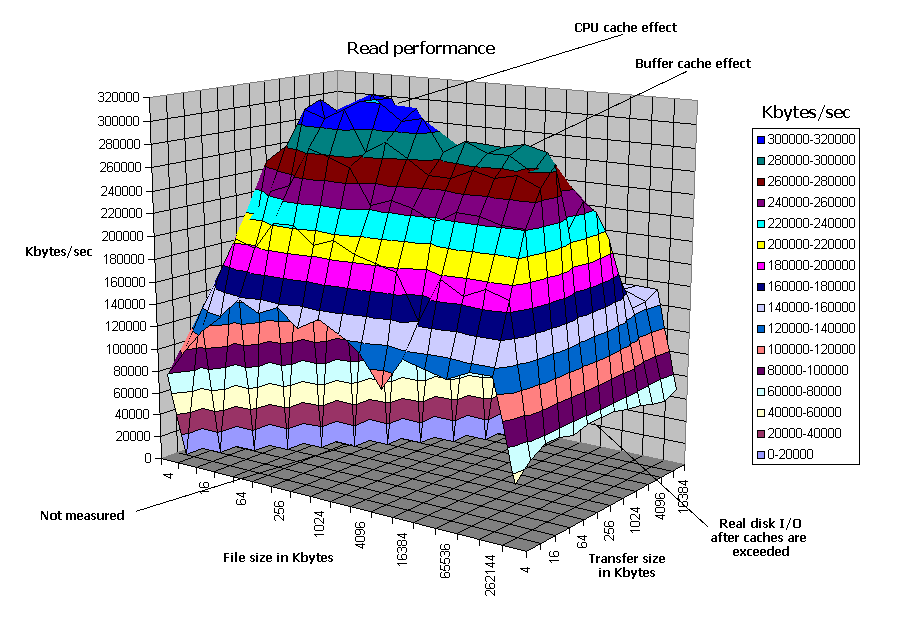
IOzone Filesystem Benchmark

IOzone Filesystem Benchmark
A very simple approach for measuring a hard disk throughput (at least reading is):
sudo hdparm -Tt /dev/sda

But for a more exhaustive measurement, taking in account tests like writing, random access etc. you could use IOzone, which is available for Linux and Windows.
It can generate Excel files which permits to create charts from the plain measurement numbers.

Example run


  1. Make sure you have some valid partition with a valid filesystem created on the disk to test. For example, on your third disk, the first partition is a XFS filesystem.

  2. Mount the partition and enter it as working directory:

    mkdir /tmp/test ; sudo mount /dev/sdc1 /tmp/test; cd /tmp/test

  3. Now run the IOzone test (we put a small maximum limit to get results quickly):

    sudo iozone -Ra -g 6M -b /tmp/Results.wks

  4. Finally, unmount the partition:
    cd /tmp ; sudo umount /tmp/test

MPEG-2 Video Support missing in ffmpeg

Today I tried to encode a MPEG-2 video in Ubuntu 8.10 (intrepid) with the following instruction:
ffmpeg -i in.avi -vcodec mpeg2video -r 25 -s pal -vb 2048 out.mpg

ffmpeg blamed about not being able to encode to mpeg2video.
ffmpeg -formats | grep mpeg2video

gave
 D VSDT mpeg2video
as result, where the E is missing which would indicate the encoding support.
Don't know when exactly this support got lost (ffmpeg also disappeared from Medibuntu repository), but after some investigation I found the solution.
You have to install different packages which include this video codec.

Install instructions


You need to have the multiverse repository enabled (see this post about how to do this from the command line).
sudo -v
sudo aptitude install ~nlibav.+-unstripped.+

If you already have installed the stripped packages, you'll be asked to remove them as they are in conflict with the unstripped one.
Now, the previous instructions give this output
 DEVSDT mpeg2video
and encoding to MPEG-2 works fine.

KeePassX crash when auto-typing special characters


KeePassX 0.3.4 has been released which fixes a crash when auto-typing special characters.
Very frequent with the '@' when your user name is your email address.

Just download the corresponding package from the download section install it with GDebi or whatever and the problem is gone.

Read more about KeePass in a previous post about it.